Everything is coming together nicely. I kind have wished I'd covered the two monitor mounts completely with black vinyl just for completeness however my supply was limited as I'd just ordered what I needed to basically cover the inside and outside of the main panels plus I'd messed up the piece for the bezel so didn't have any spare.
There are a lot of wires to tidy up and cable manage but I wanted to get everything in place and tested before I got round to that. I mounted a six way plug extension inside the bottom of the cabinet to give me a spare socket if I needed it.
Once I'd fitted the bezel perspex complete with black vinyl I discovered I could not adjust the top screen via it's remote control. Most of the time the screen comes on as the mains is switched on however sometimes it does not come out of stand by and I didn't want to be opening up the back door to power cycle the screen everything is failed to come on.
So I took the bezel off the top monitor and relocated the intra red sensor to a wiring loom that I then mounted on the amplifier panel at the back. I can just reach round and use the remote if I need to and it saved having to cut a small window out of the vinyl on the front of the machine. There were 3 wires to extend so I marked the orientation of the sensor before I carefully removed it so I could match the wires to the appropriate pins.
I had to drill a small hole in the back of the monitor bezel for the wires to break out and added a couple of cable ties to act as strain relief. I added a connector midway on the loom so it's still easy to remove the screen of I have to without having to release the amp panel, plus I hot glued the IR sensor in place so that's not going anywhere!
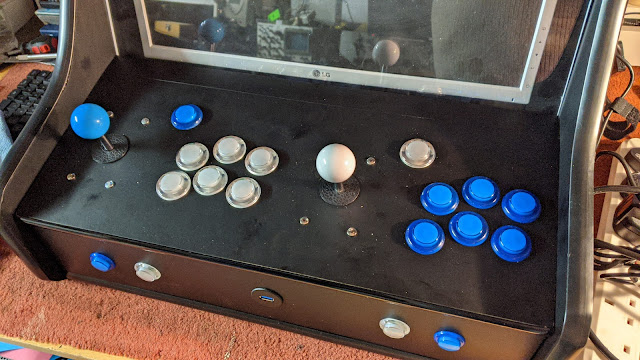
Now we are really getting somewhere. I fitted all the buttons and joysticks in place, I still have to wire them up but the machine is really looking good. I can still see some of the LG monitor bezel behind the bezel, I picked the only monitor I had that has a silver bezel itself! I ended up removing the front perspex, masking up the screen and spraying the silver bezel black. A simple fix for a simple problem!
The joysticks are a great height and it was well worth routing out a recess for them on the bottom of the control panel. Not only do they sit at the correct height but the base of the joystick is also better supported under heavy use. I used coach bolts and nuts to secure the two joysticks. I like how they look plus they should be super secure and not work lose.


No comments:
Post a Comment
If you have any comments or questions please leave them below