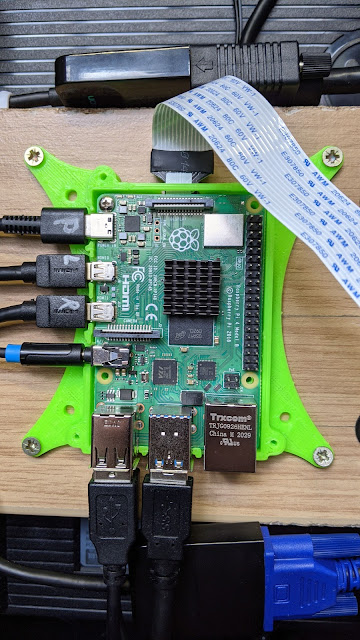
It was never going to pretty inside the MELT bartop cabinet. I have to accommodate a Raspberry Pi, 2 monitors, an amplifier and speakers, 2 joysticks and multiple buttons and USB extension to the front panel. I purchased an 8GB Raspberry Pi 4 and a 400GB micro SD card. I wanted to mount the Pi on the back of the lower monitor which puts it in the centre of the cabinet making it easily accessible. I added an SD extension as I planned to have a main image and a second image dedicated to Pinball games so this would make swapping the SD card easier.
I used self adhesive cable ties and regular cable ties to try and and route everything cleanly and neatly. That will help with air flow and just makes it easier to work on. It's difficult to make everything tidy with so many cables in such a confined space.
One of the more challenging parts of the build is keeping all the control button's wires neat. Each button has 4 wires, a pair for the switch and a pair for illumination. I also had the 2 buttons on the side to connect as well as the 4 buttons on the front panel and the space is tight. Each button has to connect to the Zero Delay USB board and that meant extending the wires to the pinball flipper buttons.
To make things even more difficult though I still hadn't decided on how the control panel would be held in place so I knew I was going to have disconnect it all again to resolved that problem.
I used the original Creative speakers that I knew marched the amplifier adding some small rubber spacers between the speakers and the cabinet. They are more than loud enough and the quality was acceptable in their original format but I don't expect booming bass in their new home.
The blue and white buttons looked great with power however 2 blue buttons on the front panel didn't work so I had to buy a couple of replacements which light up much brighter than the rest. I could add a resistor to each of them but I'm not that bothered for now.


No comments:
Post a Comment
If you have any comments or questions please leave them below