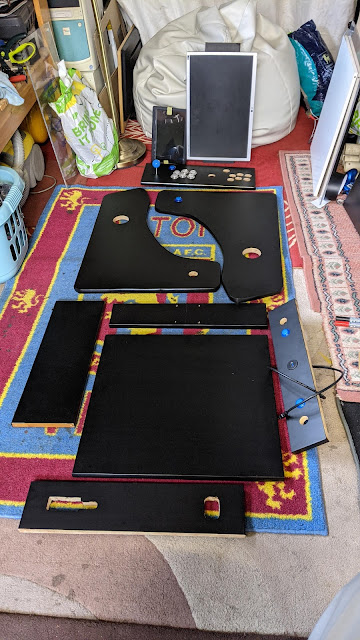
I decided I was going to cover everything in black vinyl. I wanted a nice professional finish and I felt too much of the grain would show through if I just painted everything black plus the preparation and cost would also be the deciding factor. I ordered a roll of vinyl and prepared the surfaces by lightly sanding and cleaning with sugar soap to remove any greasy residue.
The vinyl went on surprisingly well and adhered perfectly to the surface. I used a scalpel to trim the perimeter and to cut out the speaker hole and button holes. I couldn't wait to see the sides with the T-Moulding attached so I fitted that as well, cutting out a small piece of the underside of the trim when I got the the corners to allow it to sit better and follow the contours.
I carried on covering the control panel and cut our each button, once again I was excited to see the buttons in place.
I continued covering every piece of the cabinet until i essentially ended up with a flat pack kit, I couldn't resist laying it all out on the floor. At this point I haven't sourced a back door however I have a plan for that. I decided to cover both sides of everything. The only things I didn't fully cover were the two monitor brackets.
I didn't want any stray light inside the cabinet to bounce around and find it's way out of my less than perfect joints so I figured this would be minimised if everything was covered in black vinyl. I've got to say that the pictures don't do the pieces justice and they look really professional.
I still had to tackle the bezel glass and I'd been dreading doing this part. I made one attempt and completely messed up as I tried to just line the vinyl up on the perspex and stick it down, I hadn't done my research on applying vinyl to glass or perspex and didn't realise that I needed to do this part wet!
I had to cut a second bezel piece after I found out the correct procedure which is to wet the perspex with water (and a tiny bit of washing up liquid), then apply a little water to the sticky side of the vinyl, allowing for some movement before squeezing all the water out with a padded scraper. The results were amazing and as good as anything I could have produced with a laser cutter.


No comments:
Post a Comment
If you have any comments or questions please leave them below